Manual upload (legacy)
These instructions are still valid, but from 2026.4 the recommended path is to build and deploy directly from Unity. Use this manual flow only if you can't deploy from the Addressables management window.
With the manual flow the creator uses the Back Office portal to import the compiled addressables to the main server and make the scenario selectable in an experience.
Upload via external client
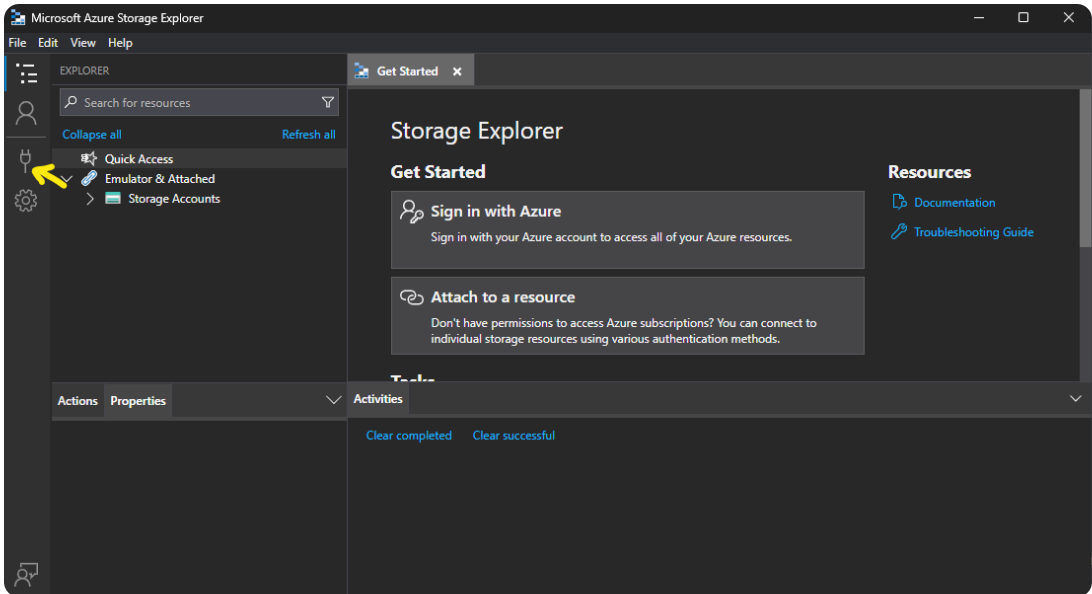
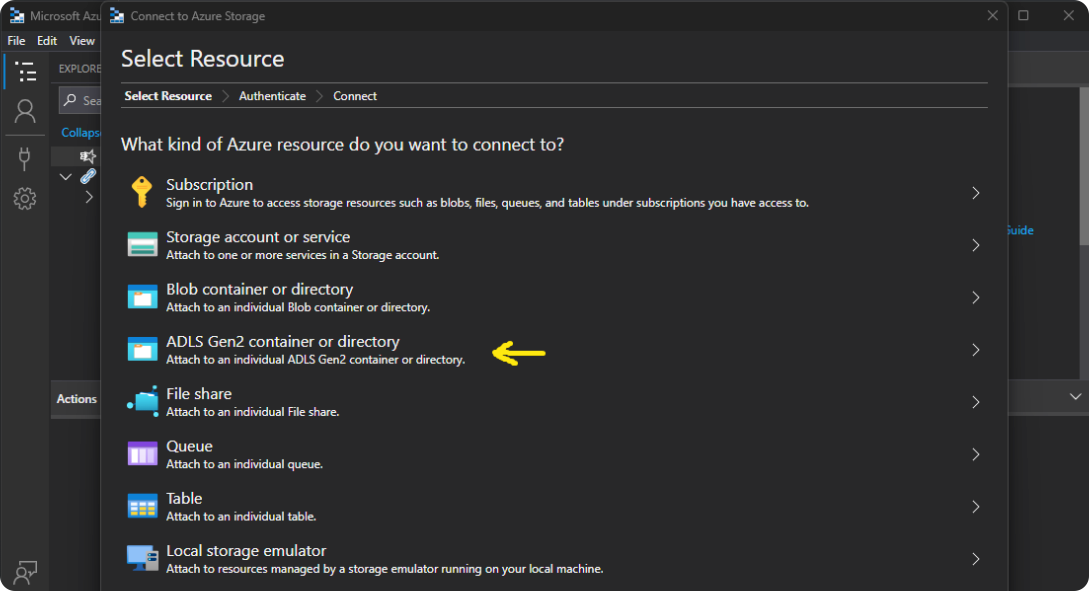
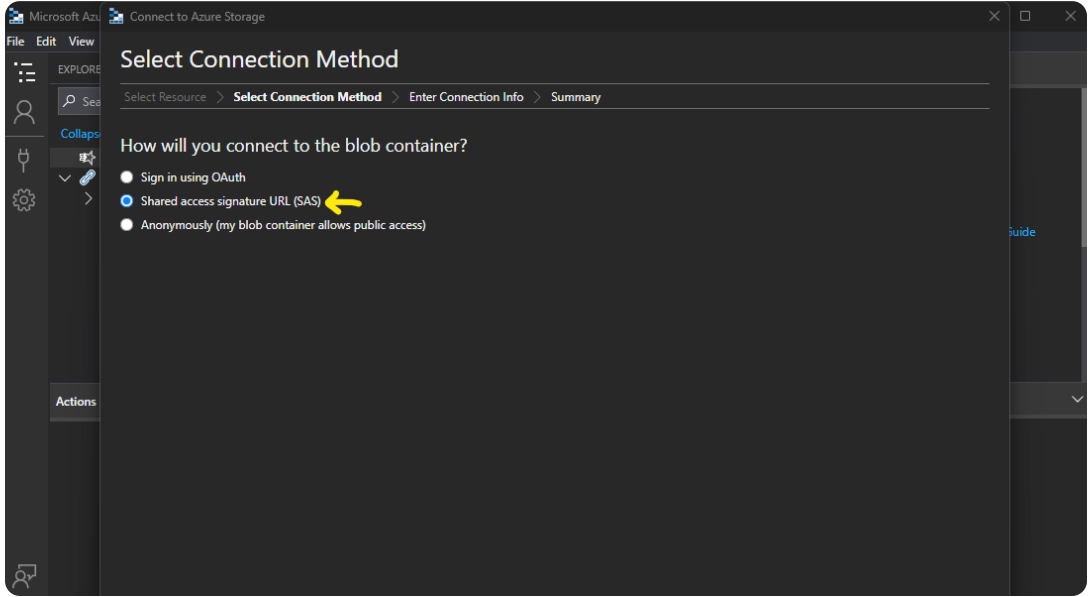
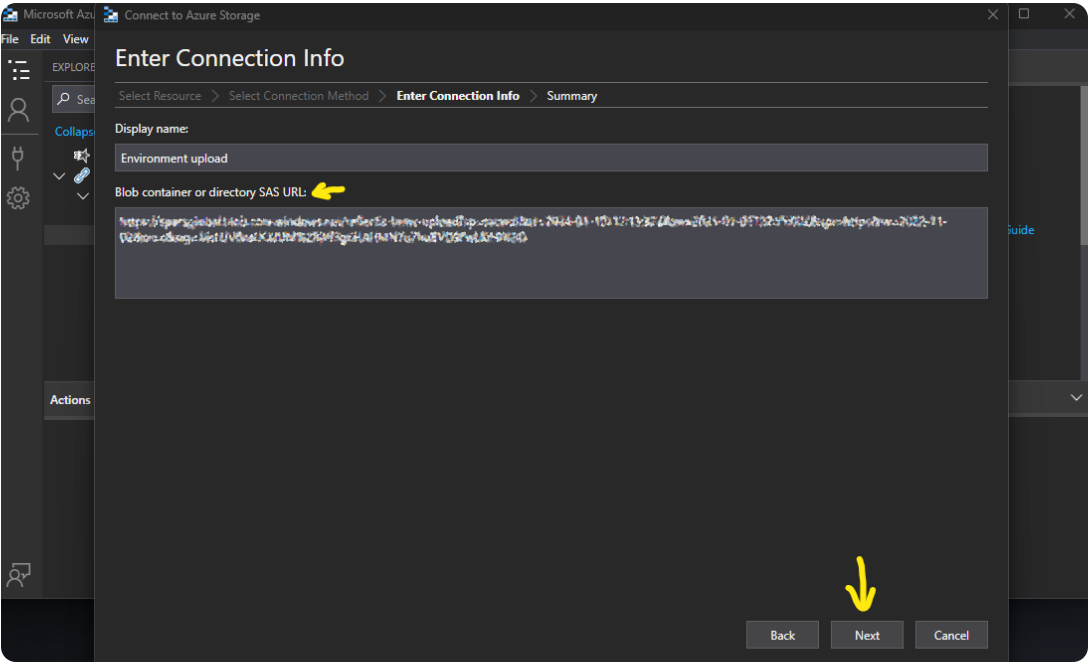
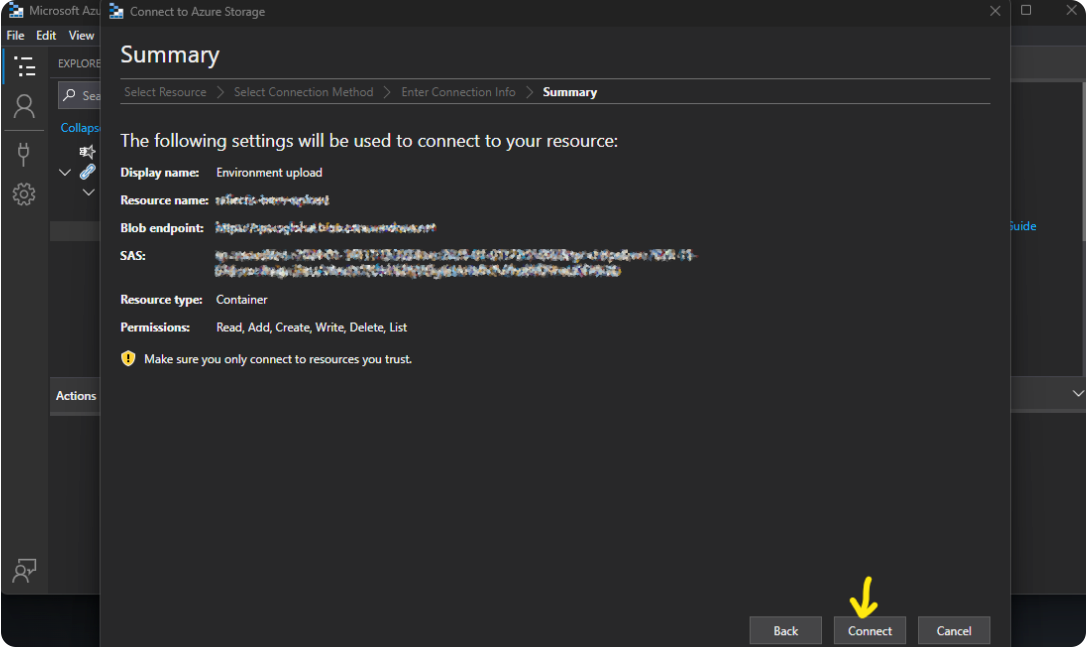
To upload an environment, connect to Azure Storage Explorer and follow these steps:
-
Download Azure Storage Explorer here. Credentials are shared by email and expire at the end of the Reflectis license lifetime.
-
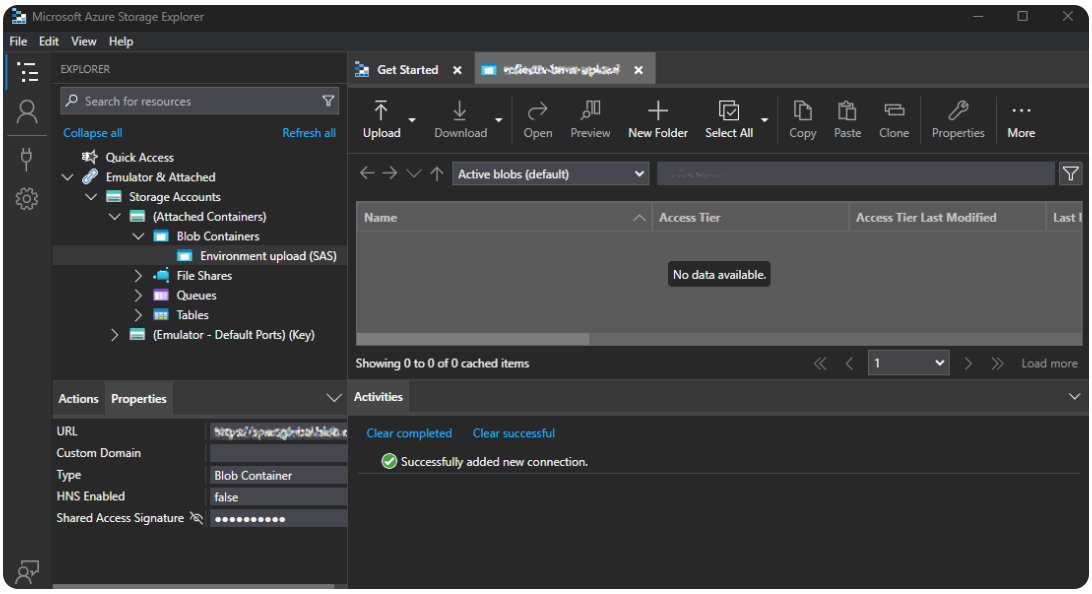
Follow the instructions in the images below:
-
The Upload URL can be found in the "World" section of the Back Office under "Link Upload Zip".
Different Worlds have different URLs.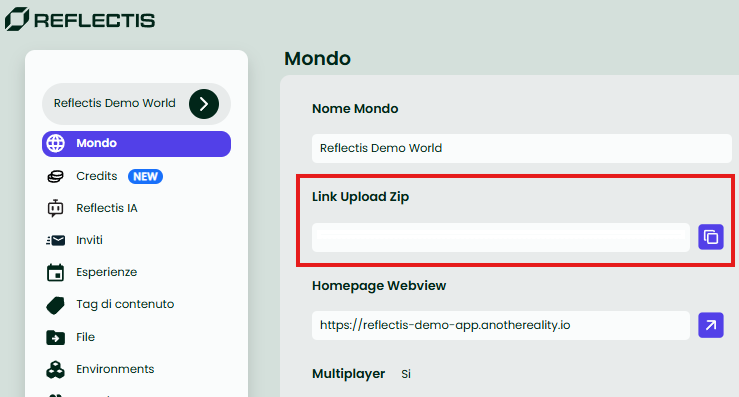
-
Drag your .zip file here:
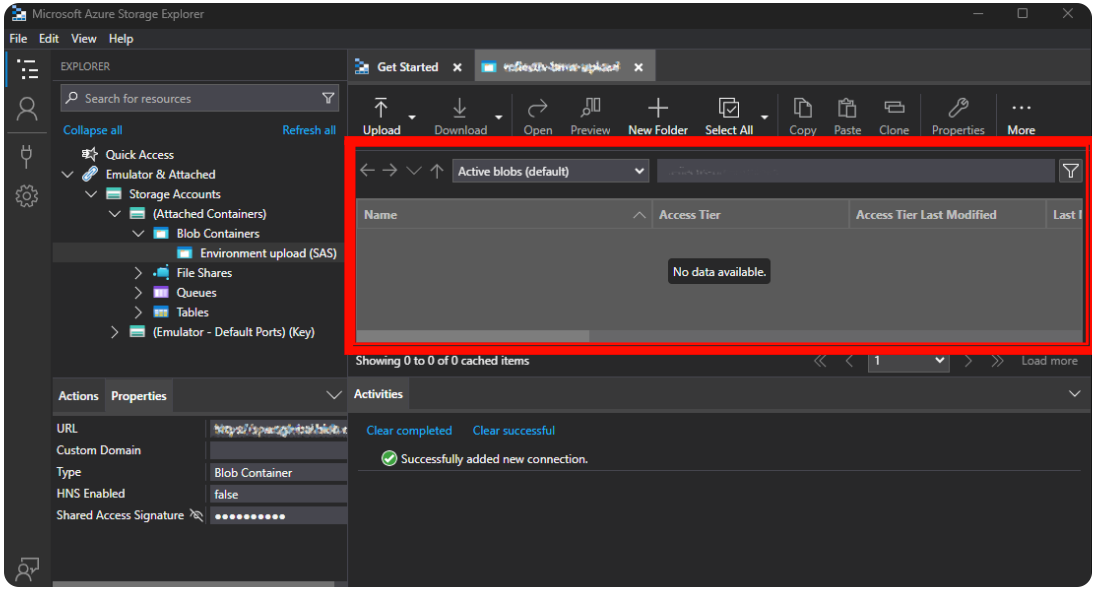
Now the .zip file will be selectable from the Back Office's environments section as described below.
".zip" files with the same name will be overwritten. Remember to backup the previous version to prevent data loss and have a better way to rollback content.
Import the Environment and create an Experience
Once the Environment is uploaded, you need two more things before being able to use it: import and create an Experience.
To import the uploaded Environment, follow the instructions in the Environments section.
Then, it's time to create the Experience! Explore how Experiences work and follow the instructions to create a new one using your Environment!
If you don't see these two menu items, it means you don't have the permissions to manage these entities. In this case, ask the Owner of the World to help you!