Connect the Creator Kit to your tenant
You can now log in to your Reflectis tenant directly from the Addressables management window and build & deploy your environments straight into your worlds — no manual upload required. The previous manual-upload flow is still available, see Manual upload (legacy).
Before you can build and deploy from Unity, connect the Creator Kit to your tenant. You only need to do this once per project.
1. Download the Creator Kit configuration from the Back Office
Log in to the Back Office and open any World in which you are allowed to upload environments. In the World panel, click Download Creator Kit Config.
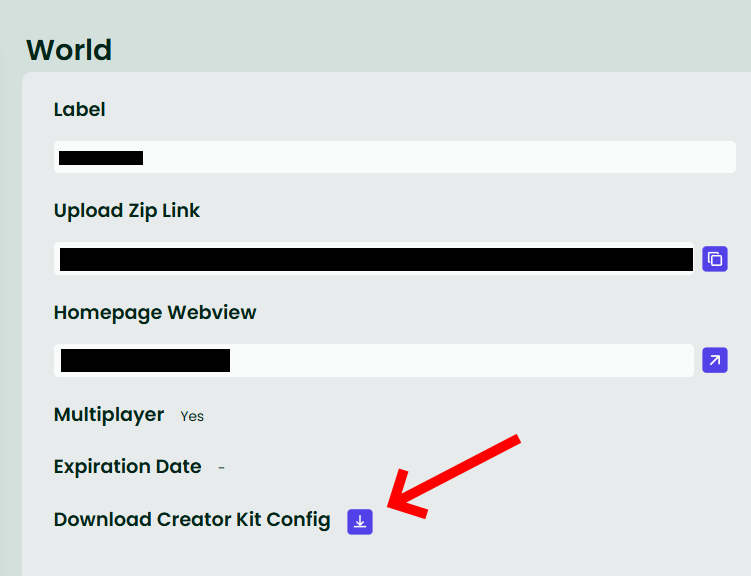
A configuration file is saved to your downloads folder. You will import it into your Unity project in the next steps.
2. Open the Addressables management window
In Unity, open Reflectis Worlds → Creator Kit → Core → Addressables management from the top menu bar, then click Login.
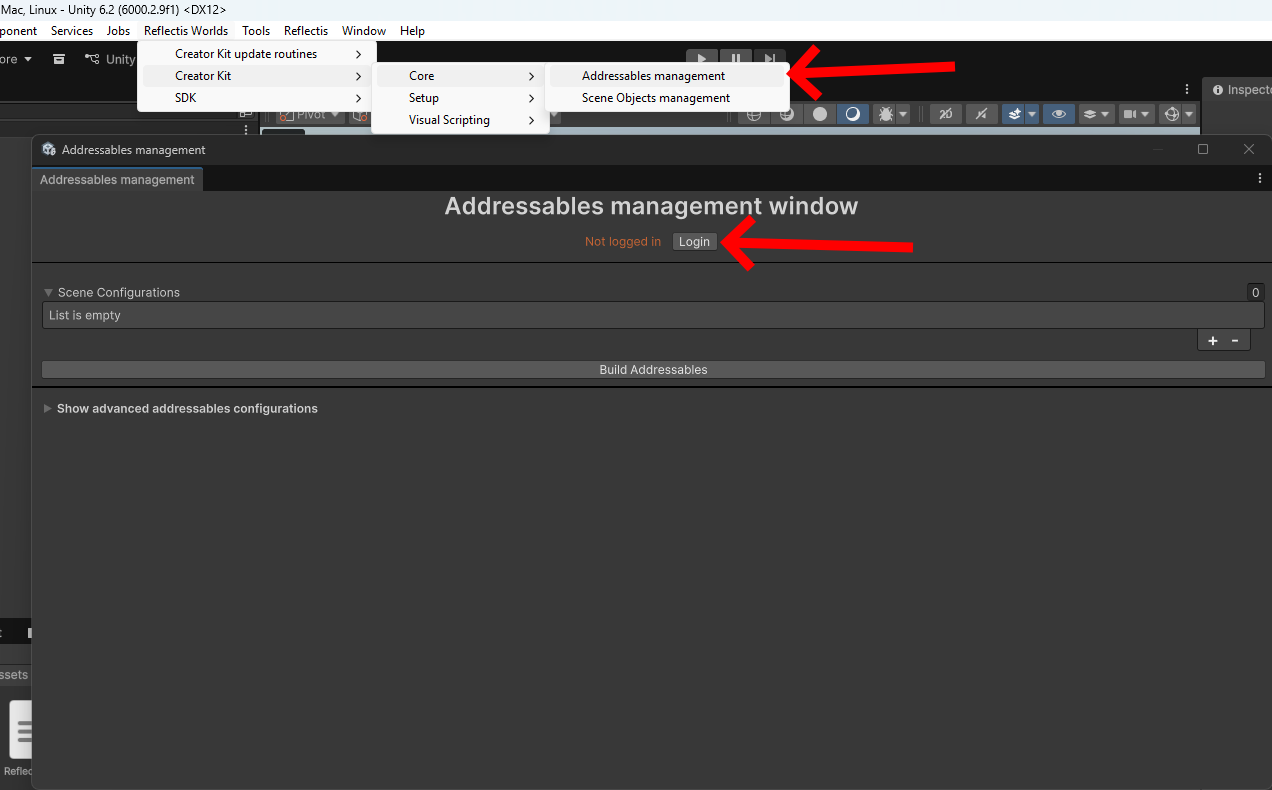
While you are not logged in, the Scene Configurations list shows List is empty — that is expected until the login is complete.
3. Focus the App Configuration Settings
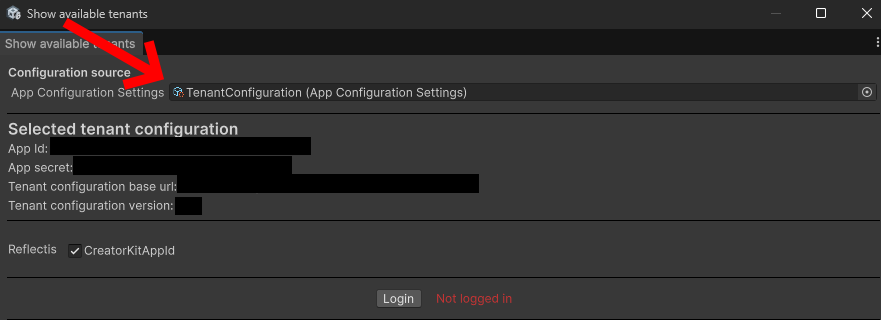
The Show available tenants window opens. Click the App Configuration Settings field (under Configuration source) to focus the scriptable object in the Inspector.
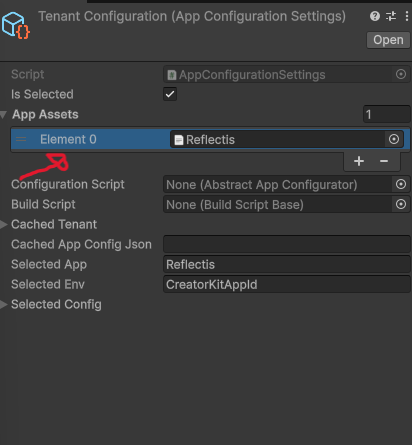
4. Add the downloaded configuration to the App Assets
Import the file you downloaded from the Back Office into your Unity project, then add it to the App Assets list of the App Configuration Settings asset in the Inspector.
5. Log in to your Reflectis app
Back in the Show available tenants window, select your app and click Login, then authenticate with your operator account.
Once logged in, the header of the Addressables management window shows your account and tenant, and the window lists the worlds available to you — ready to build and deploy into.
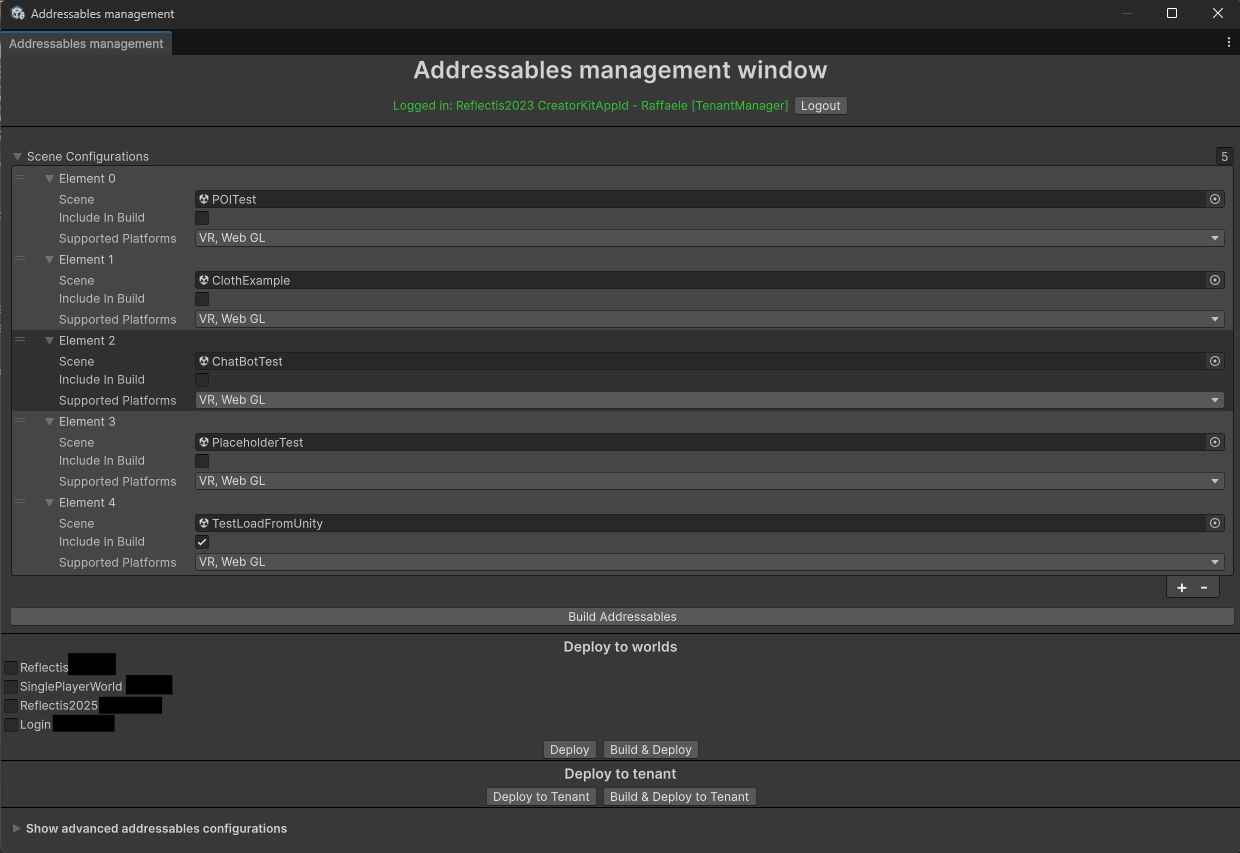
You are now ready to build and deploy your environment.