VR Device Setup
Reflectis is supported by the Meta Quest 2 and 3, so to use it on a headset you need to install the apk from SideQuest. Scroll down to learn how to properly install the application on the headset.
Step 01: SideQuest Installation
These are the steps to install the apk:
-
Go to https://sidequestvr.com/
-
In the Main Menu, click on "Get Sidequest".

-
Select "Advanced Installer".
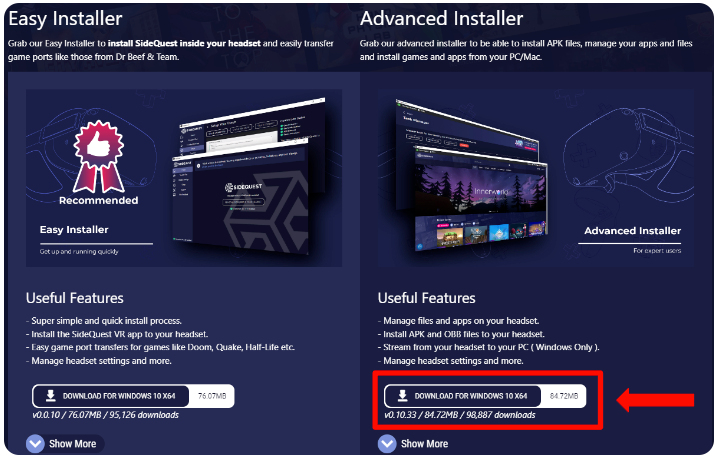
When the download is finished, complete the software installation following the guided procedure.
-
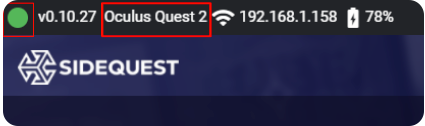
Start the SideQuest application on your PC. On the topbar it will say "Not Detected" on the right side of a red dot, when no devices are connected.

Step 02: Connecting the headset
"Developer mode" must be already active. If you don�t know how to activate it, here�s a guide for you.
The steps to connect the headeset on SideQuest are:
- Turn on the Meta Quest
- Connect to a PC through USB cable
- Enable the device from the headset.
Now the red dot on the SideQuest application would turn from red to green.
If it's yellow, it means the device has been found but needs to be granted access from the headset.
Why is the red dot still red even following the instructions?
Causes can be multiple, let's answer with the two most common situations: First thing, check if the "Developer mode" is active on your headset.
Else, disconnect the headset from the computer, close SideQuest e proceed to install the Oculus ADB drivers for Windows, following the instructions at this link. Once completed the process, try to reopen SideQuest and connect your device.
Other causes could be not allowing the connection of the device from the headset, a faulty USB cable or an old version of the SideQuest launcher.
Step 03: Yellow dot and authorizations
If the dot is yellow, "Authorization required" will appear on the side.
Wearing the headset while still connected to the computer will show an interactive PC access authorization panel. You have to select "Allow", so the SideQuest dot should've turned green.
Step 04: Uninstall the apk's old version
If you're trying to put an already installed application in the headset, it's recommended to uninstall the old version before installing the new one.
Otherwise, you can go to step 5.
-
Press this grid icon in the SideQuest's topbar.

-
Find the old version of the application and press the settings icon to the side.

-
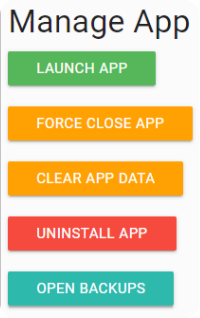
Select "Uninstall app" in the configuration panel.
-
Selecting the icon with the tick on the topbar allows you to check the un/installation status of the application.
Step 05: Install the new version
Now it's time to install the latest version of the application:
-
Select the apk installation icon, to upload the file.

-
Select the corret apk file from the PC.

-
Wait a moment or click on the icon with the tick to check how the installation is going. If everything goes alright, you'll receive a notification as this one:

Now you can disconnect from the PC and test the new application, which can be found in the "Unknown Sources" section of the headset application menu.