Manage Assets
Overview
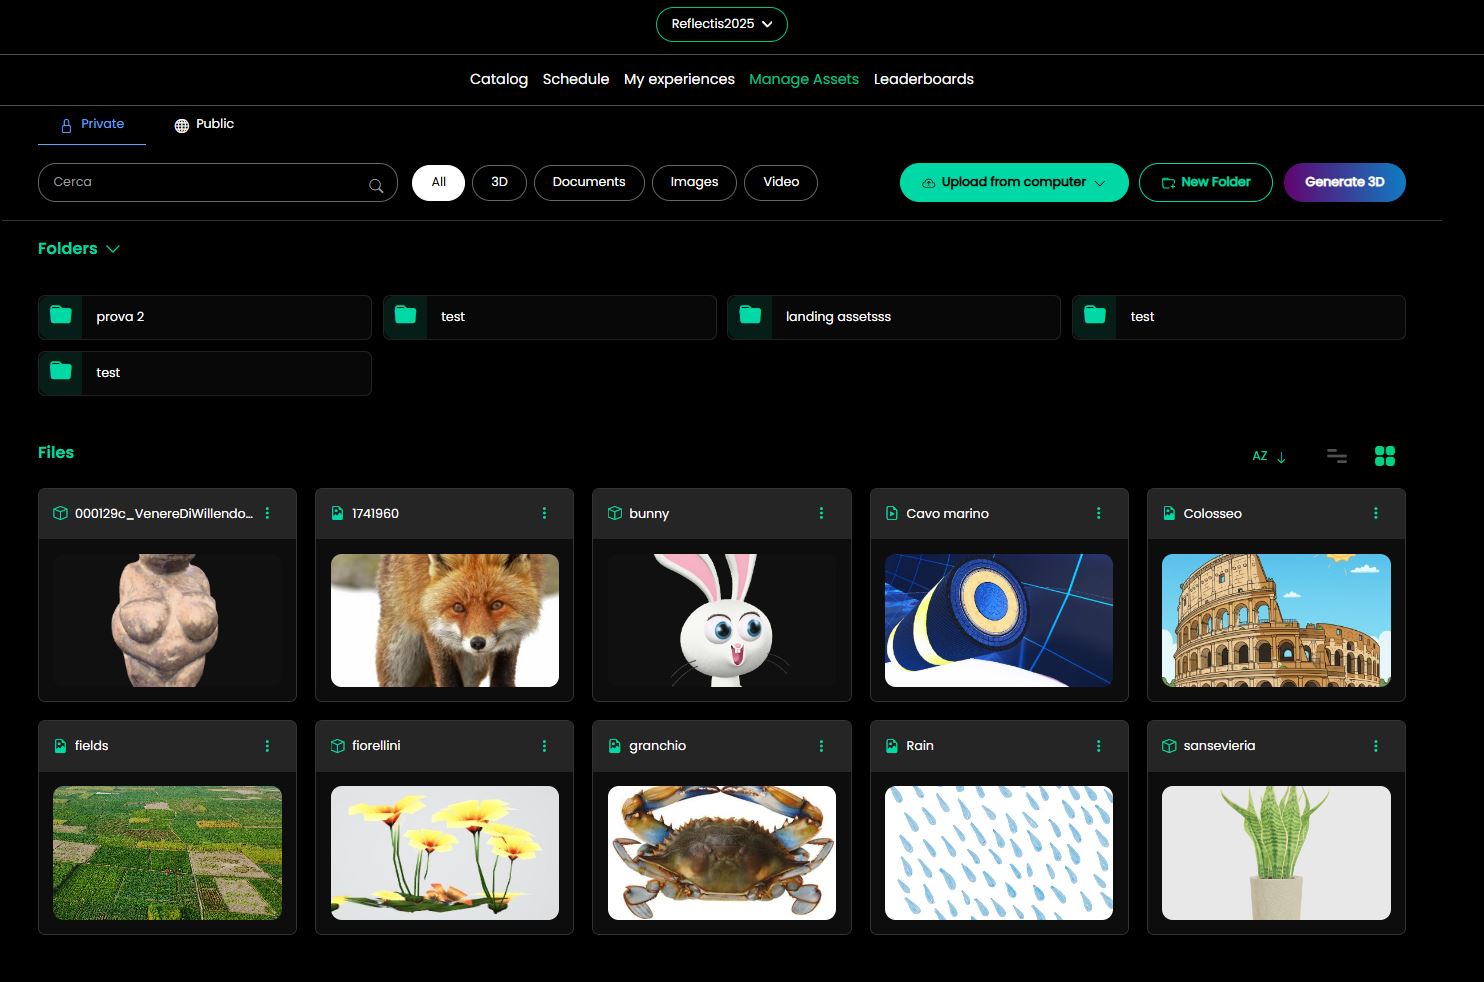
The Manage Assets page allows administrators and creators to organize and manage all media assets used in their experiences. This centralized hub provides tools for uploading, organizing, and generating 3D content.
Public and Private Tabs
At the top of the asset view, two tabs let you switch between:
| Tab | Description |
|---|---|
| Private | Assets visible only to you. |
| Public | Assets visible to all users in the World. |
When a folder's visibility is changed, a message informs you about how this affects the contained assets.
Asset Types Filter
Filter assets by type using the buttons at the top:
| Filter | Description |
|---|---|
| All | Shows all assets regardless of type. |
| 3D | Displays only 3D models and objects. |
| Documents | Shows document files (PDF, text, etc.). |
| Images | Displays image files (JPG, PNG, etc.). |
| Video | Shows video files. |
Folders
Files can be organized into folders. Folders are displayed at the top of the page and support a name that can be edited after creation.
To create a folder:
- Click the New Folder button at the top-right of the page.
- Enter a name for the new folder.
- Click Save to create the folder.
Drag & Drop
Files and folders can be moved by dragging them into the target folder.
Sharing
Asset sharing works with the folder structure:
- It's possible to share a folder with all its content.
- It's possible to share a single asset in the root.
- It is not possible to share a single asset inside a folder — you must share the entire folder.
When a folder's visibility is changed (Public ↔ Private), a message informs you about how this affects the contained assets.
Upload into Folders
When uploading a new asset, it is placed directly into the currently selected folder.
Asset Management Actions
Upload File
Upload new assets to your library:
- Click the Upload from computer button
- Select one or multiple files from your device
- The file is placed into the currently selected folder
- Wait for the upload to complete
Supported file types include:
- 3D models (GLB, GLTF, FBX)
- Images (JPG, PNG, GIF)
- Videos (MP4, WebM)
- Documents (PDF, TXT)
Generate 3D
This feature must be explicitly activated for your world. Contact support to enable AI-powered 3D generation for your environment.
Use AI to generate 3D models from text descriptions, images, or both:
- Click the Generate 3D button
- Choose your generation mode:
- Text-to-3D: Enter a detailed description of the object
- Image-to-3D: Upload 1-5 reference images
- Hybrid: Combine images with text prompts for modifications
- Click Start Generation and wait for the AI to process
- The generated asset will be automatically saved in the Generated 3D folder
For complete documentation on AI-powered 3D generation, including detailed examples, best practices, and tips for optimal results, see the 3D Model Generation page.
Asset Cards
Each asset is displayed as a card showing:
- Preview thumbnail of the asset
- Asset name
- Asset type icon (3D, document, image, video)
- Options menu (three dots) for additional actions:
- View details
- Download
- Delete
- Move to folder
- Rename
Sorting and Viewing Options
Use the toolbar controls to customize your view:
- A-Z sorting – Sort assets alphabetically
- List/Grid view – Toggle between list and grid display
- Search bar – Quickly find assets by name
Best Practices
- Organize by project – Create folders for each experience or project
- Use descriptive names – Name assets clearly for easy identification
- Regular cleanup – Remove unused assets to keep the library manageable
- Backup important assets – Download and store copies of critical content