Configuration
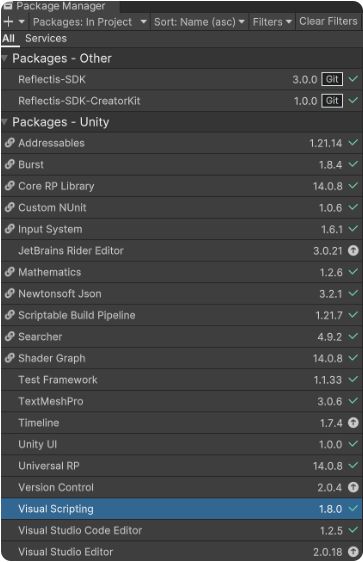
To implement visual scripting in the project you need to use the Unity "Visual Scripting" package, available from the package manager.
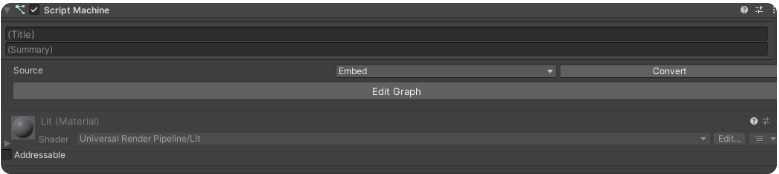
When downloaded, it allows you to use the Script Machine to open the graph editor and start scripting!
If you want to learn more about how visual scripting works and is used, here are some Unity tutorials to learn it:
How to install it
-
Install the "Visual scripting" package from the Package Manager
-
Add component "Script machine" to an object (only after downloading the "Visual Scripting" package!)
-
The “Source” of the graph can be of two types:
- "Embed" - that allows for graph scripting in the current object only (easier to manage)
- "Graph" - that makes it possible to share graph files (useful to be saved beforehand or to use them on another object). In this case, you will have to save the new graph in a folder among the project assets.
Moreover, you can easily convert an embed graph to a shared one by clicking on the "Convert" button.
How to network a behavior
The Node "Convert Action" is essential for being able to network a behavior. This node doesn’t exist from the beginning and needs to be inserted into the Unity visual scripting Library, before becoming usable.
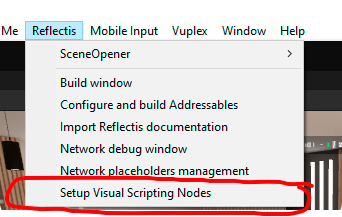
Go to Reflectis and click on Setup Visual Scripting Nodes.
From this point on it’s possible to call the method "Action Invoke" as a usable node on the Graph Editor.
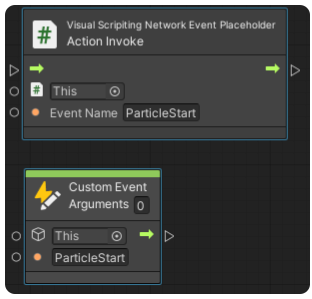
All the events referenced in the Event Name string space will be networked.
The method "Action Invoke" of referenced events must have 0 arguments, or it will result in a compiling error.
From this point forward the custom event can be customized freely to obtain a special behavior not present in the Creator Kit.